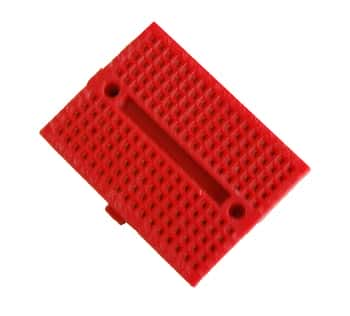
Red Solderless Breadboard Modular 170 Tie Points 1.84 in x 1.37 in
 |
Manufacturer: Everest
Part Number: G595APH01
Material: Plastic
Color: Red
RoHS Compliant: Yes
Shape: Rectangle
Pitch (mm): 2.54
Terminal Strips: 1
Tie Points: 170
Price: $3.79
89 available for immediate delivery
Code: G595APH01
Weight: 0.50oz
| ||||||||||
Additional Information
Solderless BreadboardsFeatures:
- Modular (Interlocking to form larger board)
- Miniature Size
- Adhesive Backing
- Mounting Holes
A solderless bread board is a must have for anyone experimenting with electronic circuits. There is no soldering involved so you can easily design a circuit, test it, and if needed make any necessary changes. Once you are confident that your circuit is working properly you can transfer your design permanently to a printed circuit board.
These miniature size prototype boards are great for large or small projects. They have interlocking snaps on the sides and the ends so you can create a work space that is the perfect size for your circuit.
Color: Red
Number of Terminal Strips: 1
Number of Tie Points: 170
Number of Mounting Holes: 2
Dimensions:
Length: 46.83mm (1.84")
Width: 34.87mm (1.37")
Height: 9.06mm (0.36")
Distance Between Mounting Holes: 37.0mm (1.45")
What is a Solderless Breadboard?
A solderless breadboard is a reusable plastic box with holes for inserting various electronic components to create and test new circuits. There are metal strips running under the holes in order to connect everything electronically. These boards may also be referred to as plugboards, prototyping boards, or design boards.
What other items may be needed when using these prototype boards?
Very few items are needed for use with a solderless breadboard. Along with equipment for power and testing you will need insulated wire (a couple of different colors are advisable), bare wire, needle nose pliers and wire cutters. (A time saving item you may want to use is a jumper. Jumpers are smaller pieces of wire that have already been stripped and preformed.)
Where should the components be placed on the board?
IC s should be inserted so that they straddle the slot down the middle of the board. This allows air flow for cooling. The other components are placed so that any 2 leads (or up to 4 leads) placed in the same row will be connected electronically. If more than 4 leads need to be connected you can use wire to connect multiple rows to form a common contact.
Manufactured by: Everest
RoHS Compliant

