Tag Archives: Prototyping

Advantages of Additive Manufacturing

Additive manufacturing, like those from 3-D printers, allows businesses to develop functional prototypes quickly and cost-effectively. They may require these products for testing or for running a limited production line, allowing quick modifications when necessary. This is possible because these printers allow effortless electronic transport of computer models and designs. There are many benefits of additive manufacturing.

Designs most often require modifications and redesign. With additive manufacturing, designers have the freedom to design and innovate. They can test their designs quickly. This is one of the most important aspects of making innovative designs. Designers can follow the creative freedom in the production process without thinking about time and or cost penalties. This offers substantial benefits over the traditional methods of manufacturing and machining. For instance, over 60% of designs undergoing tooling and machining also undergo modifications while in production. This quickly builds up an increase in cost and delays. With additive manufacturing, the movement away from static design gives engineers the ability to try multiple versions or iterations simultaneously while accruing minimal additional costs.

The freedom to design and innovate on the fly without incurring penalties offers designers significant rewards like better quality products, compressed production schedules, more product designs, and more products, all leading to greater revenue generation. Regular traditional methods of manufacturing and production are subtractive processes that remove unwanted material to achieve the final design. On the other hand, additive manufacturing can build the same part by adding only the required material.

One of the greatest benefits of additive manufacturing is streamlining the traditional methods of manufacturing and production. Compressing the traditional methods also means a significant reduction in environmental footprints. Taking into account the mining process for steel and its retooling process during traditional manufacturing, it is obvious that additive manufacturing is a sustainable alternative.

Traditional manufacturing requires tremendous amounts of energy, while additive manufacturing requires only a relatively small amount. Additionally, waste products from traditional manufacturing require subsequent disposal. Additive manufacturing produces very little waste, as the process uses only the needed materials. An additional advantage of additive manufacturing is it can produce lightweight components for vehicles and aircraft, which further mitigates harmful fuel emissions.

For instance, with additive manufacturing, it is possible to build solid parts with semi-hollow honeycomb interiors. Such structures offer an excellent strength-to-weight ratio, which is equivalent to or better than the original solid part. These components can be as much as 60% lighter than the original parts that traditional subtractive manufacturing methods can produce. This can have a tremendous impact on fuel consumption and the costs of the final design.

Using additive manufacturing also reduces the risk involved and increases predictability, resulting in improving the bottom line of a company. As the manufacturer can try new designs and test prototypes quickly, digital additive manufacturing modifies the earlier unpredictable methods of production and turns them into predictable ones.

Most manufacturers use additive manufacturing as a bridge between technologies. They use additive technology to quickly reach a stable design that traditional manufacturing can then take over for meeting higher volumes of production.

Prototyping Plate Kit for the Raspberry Pi

For new owners of the versatile inexpensive Raspberry Pi or RBPi, there is always a period of perplexity as to how they can try out an embedded computer project with the SBC. Although a breadboard helps to some extent, connecting the circuit on a breadboard to the RBPi involves many loose wires, making the experiment very cumbersome. An add-on kit, the Pi Plate from Adafruit, makes it very easy to prototype circuits for the RBPi.

The Pi Plate snaps on to the RBPi and the user can easily unplug it for making any changes to the circuitry. This is a double layer board and has a connector on the underside for fitting on to the GPIO pins of the RBPi. The specialty of the Pi Plate is the huge prototyping area, half of which is in the form of a breadboard style, and the rest in the form of a perfboard style. Therefore, users can wire up DIP chips, sensors and switches.

All the GPIO, I2C, SPI and Power pins from the RBPi are broken out to 0.1” strips along the edge of the proto area. The connections are all labeled, so the user has little difficulty in connecting them to his/her prototype circuit. In addition, all the breakout pins are also connected to 3.5mm screw-terminal blocks, all with labels. That makes it very easy to connect sensors, actuators, LEDs, etc. semi-permanently with wires. For general-purpose non-GPIO connections, there is also a 4-block terminal block broken out to 0.1” pads. For those with surface mount chips to be connected, the remaining space has a SOIC breakout area, therefore, if you can conveniently use an IC that does not come in a DIP format.

When you buy the kit, all parts come separated. Following a tutorial on how to assemble the kit, any first-time user can learn to put it together. One advantage with this process is the user learns to solder and thereby acquiring a new skill. This is in line with the philosophy of learning with the RBPi.

Those who regularly use add-ons to the RBPi will appreciate that the header breakouts on the Pi plate are taller than the typical custom header breakouts. Therefore, the prototype plate sits above the metal connectors on the RBPi, allowing for a large workspace. However, this does not prevent it from fitting within the RBPi enclosure. Therefore, the RBPi remains safe within the enclosure, with complete access to the terminal blocks, making prototyping simple. Adafruit plans to have stackable header kits, which will help in putting multiple plates on top of the RBPi.

It is very easy to use the Prototyping Pi Plate. Adafruit has designed it to be as simple as possible so that it is a good fit for any type of RBPi project – whether simple or complex. According to Adafruit, there is no extra power regulator on board and none of the pins is buffered, because that keeps the design simple and inexpensive. In addition, it also offers the maximum space for adding any circuitry for prototyping.

What are breadboards?

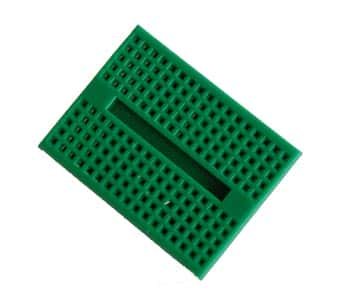
Plastic BreadboardBreadboards are a simple solution for circuit building, especially when you need to prototype or test a circuit. Constructed of plastic, a solderless breadboard contains hundreds of spring-loaded connection sockets (also called tie points) which connect the leads for through-hole electronic components and 22 AWG wire to form an electronic circuit. One key feature of breadboards is that they require no solder to connect your components making testing or prototyping a circuit very quick and painless.

How do breadboards work?

A breadboard is constructed on hundreds of holes arranged in vertical and horizontal rows. The outer rows which run lengthwise across the circuit board are generally reserved for the circuit’s power supply. The interior rows of holes are where the electronic components are inserted. Each row of holes forms a node; that is, any components that reside on the same node will be connected when they are inserted into a hole in that same row, or node. This is because under each row is a copper plate that connects the holes to each other.